So I have completed drawing and adding a background to the drawings. I really enjoyed the layer feature on Photoshop. Thanks to Sarah I was able to add my drawings and manipulate them on to the photos I took in Weldon.
What I did…
- I opened both my drawing and the photo in Photoshop.
- I used the “magic wand” tool, and then clicked on the empty space on the image that I drew.
- Next, I went to select, and clicked inverse.
- Then I copied my drawing and pasted it on the photo.
- Then I used the “rectangle” tool and made it trace over my drawing that I pasted in the photo. I needed to do this because the image was always too small when I pasted.
- Next, I did “command T” to “transform” the image in my rectangle. At this point I could enlarge and move my drawing all over the photo. Sometimes, depending on the image, once I was done transforming the whole drawing I would go back and rectangle off certain parts so that I could alter only a section of a drawing. This was very affective for creating distance in the image. I used it to create space between the Octopus and the Ninja.
- Once I was done transforming the image I clicked on the “checkmark”. Then I went to select and clicked on deselect.
For some images I would add more to the drawing. To do this, I would drag the image onto my tablet. The really nice thing about the layers is that when you want to erase something you have drawn, it does not erase the background.
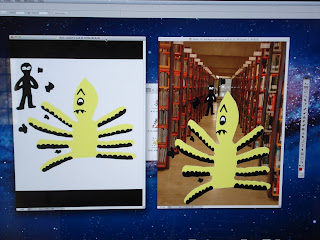 |
| See how I moved the ninja in the photo with the picture background to create distance. |
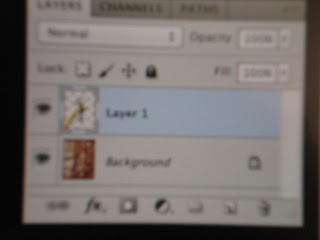 |
You click on the layer you want to work on.
|
For my next step I am going to make a PDF with two pages side-by-side like a picture book, which people will be able to flip through. I think that the picture book format will better suit how I originally outlined my story, when I pictured it like a silent film with text and picture.


No comments:
Post a Comment