Thursday 2 May 2013

Killer Heels at the Bata Shoe Museum


Bata Shoe Museum
327 Bloor Street West
On Tuesday April 30th, I volunteered for a Western University alumni event at the Bata Shoe Museum. The highlight of the night was Professor Kelly Olson’s lecture entitled Sex and Shoes. As a Western alumnus (twice) I often get emails inviting me to events that I usually delete; however, with a title like that I paused and read the email and knew I wanted to go.


The women arrived donning fabulous footwear. And the men came accompanying the women. After a tour of the museum and drinks the lecture began. The chairs were filled as everyone took a seat with a little sigh of relief from their feet – the consequence of our footwear choices. However, we were soon to find out that our decision of style over comfort is something that many women throughout history share.
 
Professor Olson notes that the history of footwear can be seen and understood from several viewpoints; such as economic and social. The seminar focused on footwear as a “social erotic object” for wearer and observer.
 
With the title being Sex and Shoes you can probably guess that the lecture focused on the history of the high heel –your Uggs for Weldon didn’t make the list. The wedge shoe goes back to ancient Greece. There are images of the Greek goddess Aphrodite wearing platform shoes from the 7th century BCE. Also, ancient Greek actors wore wedge shoes so they could be better seen by the audience.
Chopines
During the Italian Renaissance platform shoes became popular among wealthy women. Wealthy women wore chopines to make them appear taller and to suit the style of skirts. Yet, chopines were originally part of lower class fashions. In 14th century Florence, prostitutes had to wear chopines and nuns were forbidden from wearing them. Clearly marking the early stages of the association of heeled shoes as an object symbolizing lust. Chopines became popular among the Italian aristocracy for economic reasons. Primarily because chopines made skirts much longer, this meant that one had to be rich in order to afford the additional cloth needed for the length. Secondly, the impracticality of chopines required the women wearing them to be surrounded by servants to lean against, further adding to them as indicators of wealth.  Chopines lost popularity to the stack heel.


King Louis XIV in red heels


One remark I found greatly interesting was the fact that Historians do not know where the heel originated from. Nonetheless, by 1650 both men and women wore stack heels. King Louis XIV wore red heels, and only those a part of the French court were allowed to wear red heels. (Christian Louboutin exhibit coming to the Design Exchange this summer, I plan on learning if this is where he got the idea from.)
Pointed heel = sharpened fantasies

Throughout the 19th century young women used heels to define themselves against previous generations by adopting the footwear associated with prostitutes. A major trend in the 19th century was the continuous thinning of the heel, leading to the creation of the stiletto in the late 1940s. An interesting point was the correlation between the steel industry and the stiletto. A steel heel was needed to support the longer and thinner heel. From the 1980s to present times, heels have a place as an erotic symbol due to their current status as a part of lingerie.


The high heel seems to be a lasting fashion staple for women representing femininity and sexual desire. A common material object, that has created a not so simple mark on women’s history.
 
Some photos from the Bata Shoe Museum exhibit.
 
 
Baroque

India- Paduka


Wednesday 3 April 2013

My Visit to the City of Toronto Archives

 
I recently headed to the City of Toronto Archives photo exhibit entitled Picturing Immigrants in the Ward: How Photography Shaped Ideas about Central and Eastern European Immigrants in Early 20th-century Toronto. The exhibit is on until May 2013, and is free. Also, there is free parking at the archives!

 
I’ve wanted to visit the exhibit since the summer when it first opened, but only recently had the time. I was drawn to the exhibit by the poster’s title and picture. One of my grandfathers was born and raised in the Ward, and I have heard stories about it all my life. Further, the poster picture is of a Jew carrying chickens, which was my great-grandfathers business back then. I could not believe the coincidence; I had to see the photos.
 
 
The exhibit was in the entry gallery of the archives building. The exhibit aimed at showing the often conflicting images of Toronto’s 20th-century Eastern European immigrants of “the Ward”. The Ward’s boundaries were College Street to the north, Queen Street to the south, Yonge Street to the east, and University Avenue to the west.


Map of the Ward

The Ward in the early 20th-century was known by the upper and middle class residence of Toronto for its unsanitary conditions, which came to represent foreign-born people settling in the city. The beginning text of the exhibit deals with the efforts to clean the Ward. I enjoyed this part of the exhibit because the effects of urbanization and mass migration of immigrants to a city is not usually a theme in Canadian history classes from my experience, it is more a topic I have studied in British history classes. I enjoyed learning about the process of urban and social reform for my home city. According to the exhibit the first major effort for change came in July 1911, after Dr. Charles Hastings, Medical Health Officer, produced a report on the slum conditions in the City of Toronto. The report revealed that Toronto had many of the same conditions associated with the slums of the so-called “great cities” of Europe and America. These conditions included overcrowding, filthy yards and outdoor toilets. Dr. Hastings launched a campaign for public health reform.

 
One of the ethnicities the exhibit highlighted as being shown in various lights due to photo images were the Jews. The exhibit included images from the Ontario Jewish Archives that helped created a counterview to the negative images of the residence of the Ward living in squalor. This included images of respectably dressed young brides and grooms. Also, a newspaper article from the Yiddish newspaper Yidisher Zshurnal (The Hebrew Journal) that showed Leo, John, and Michael Tchernovsky on the day they played at Massey Hall.
 
 
The Tchernovsky Brother
Ontario Jewish Archives

Though the exhibit was small, I thought it did an excellent job showing how the medium of photography was influential in shaping Torontonian’s perspectives of immigrants. Further, it demonstrated that images and government reports only contain one component of a community’s history; such as representing common struggles and obstacles. However, these sources often can leave out individual moments of triumph, and the shared moments of celebration that are found in all cultures such as birth and marriage. I enjoyed the exhibit’s efforts to illuminate on the social history of Toronto.


Postcard at the archives from 1915


Wednesday 6 February 2013

My Visit to Yad Vashem


On the last day of my Birthright trip we went to Yad Vashem. I was dreading the visit and my stomach already felt in knots the night before. Though I am a historian and thoroughly enjoy studying Jewish history, I avoid studying the Holocaust. While the Holocaust history course is a popular course in the history department at my university, I knew that I could never handle a whole year of constantly reading and seeing the images week after week. I much prefer studying the high points in Jewish history: the rise of the Jewish immigrant in North America, Golden Ages, and Yom HaAtzmaut.

For this blog post I am going to write about the images and parts of the museum that are stuck in my memory as I write this post several weeks since I returned from Israel. As a person who hopes to work in a museum, I am most interested in the lasting images and feelings one takes away from a trip to a museum.


I arrived at Yad Vashem on a sunny Sunday in Jerusalem, which was a rarity during my time in Israel, where I experienced severe rain. Located on Mount Herzl, I was surprised by the complex’s size. The complex contains several buildings such as the Holocaust History Museum, Art Museum, Exhibition Pavilion, and Learning Center. It also has beautifully landscaped grounds with a variety of monuments and sculptures.

One of my group’s first stops on the tour was at the entrance to The Avenue of the Righteous Among the Nations. I found it very important that our tour guide took my group to the Avenue before we entered into the depths of the triangular shaped building where the Holocaust Museum is. Though I was a good undergraduate student, and when my Professors asked me to list the causes of the Second World War and the Holocaust on an exam I would dutifully write the terms of the Treaty of Versailles, the switch from Jew-hatred to anti-Semitism and so on, but these never felt like complete answers to me. I can’t comprehend how people kill innocent children, or even watch over them as there locked-up and starving.
Irena Sendler
Irena Sendler

I found it very beneficial hearing about the individuals commemorated at the Avenue before I entered the museum, because it gave me something positive to remember when I felt choked by the images. The Avenue of the Righteous Among the Nations is a path that has a tree planted in honour of each of the brave Gentiles who risked their life, and their families lives, to save Jews. At the entrance to the Avenue is the tree for Irena Sendler. Sendler was a social worker employed by the Welfare Department of the Warsaw municipality. In September 1943, Sendler was appointed director of Zegata’s Department for the Care of Jewish Children, during which time she saved thousands of Jewish children, even keeping their locations secret when she was arrested. Though I may still be unable to fully comprehend the Holocaust and other genocides, even though I am an adult who has been hearing and learning about these events since a young child, I find the stories of individuals’ bravery and kindness one of the only ways of comprehending such atrocities.

Tree of Irena Sendler, Yad Vashem
Tree for Irena Sendler
http://www1.yadvashem.org/yv/en/righteous/stories/sendler.asp


The part of the museum that I most enjoyed was the video reel of clips of Jewish life in Eastern Europe before the war. The reel is the first image you see once you enter the museum.  The clips included images of singing school children, women waving in front of store shops, and musicians. The reel was to remind museum visitors about the full life Jews led prior to the Holocaust. My grandfather, who was a Holocaust survivor, had actually came to Canada prior to the war, but returned to Poland because he missed it. This has always been a point I have had issues fathoming as I see Canada as my home, and have the knowledge of the coming doom hindering my ability to picture Jewish daily life in pre-war Poland. But in the video images, I could see the full community life that my grandfather missed, and decided to return to.
 
 
One image that I keep thinking about is the painting The Refugee (1939) by Felix Nussbaum. In the painting a man is slumped over on a stool with his head in his hands. Beside him is a stick and a bundle of belongings, he is ready to travel. However, the door to the outside is blocked by a globe that is covered by shadows. The painting is near the beginning of the Holocaust museum, which is organized in a chronological narrative. The painting represented for me one of the most infuriating parts of Holocaust history, the anti-Semitic immigration policies of Allied countries prior to WWII.

The Refugee, 1939
The Refugee
http://www1.yadvashem.org/yv/en/exhibitions/nussbaum/nussbaum_5.asp

At the end of the museum there is the Hall of Names. The Hall of Names is a memorial for every Jew that perished in the Holocaust. The ceiling of the Hall is cone shaped, displaying pictures and fragments of Pages of Testimony. Under the ceiling cone is an opposite floor cone, where the images are reflected in the water base. As I was walking around the cone, looking up at the images, one picture made me stop. It was a picture of two sisters in their bathing suits outside on a sunny day. The image captured my worst fears about the Holocaust –being small and powerless, and being taken away from the people I love the most without knowing what is happening to them. The photo stood out for me amongst the many images because my sister and I have many pictures like the one I saw in the Hall; were just fortunate to be born fifty years later. I have been trying to find (but haven’t yet) the picture in the Yad Vashem on-line archives so I can remember the two girls names.


After the Hall, my group exited the museum, and got to inhale the cool Jerusalem air, while having an amazing view of the city covered in snow. (This made everyone excited, but the group of Canadians.)

I don’t have any wise words; this post is just a collection of things stuck in my memory. On a side note, as I finish writing, my sister is ladling out matzo-ball soup for our dinner tonight. 


*Images and information taken from http://www.yadvashem.org/

*Also, if this happens to survive as a source in the future, I don’t want it to be used by a historian writing about the grandchildren of Holocaust survivors. I am not very good at expressing my thoughts. Most of my thoughts in this post are incomplete.

Monday 9 April 2012

History, a Reflection of the Historian Who Writes it.

I have heard it said that all historians do research that reflects their personal or familiar past. I would not want to over generalize about all, since I only know a few historians. But my project this semester definitely reflects my feelings (frustrations) with having been a TA this past year.

I have spent a vast amount of time telling my students to follow Rampolla, and demonstrating the differences between the style for a footnote and bibliography. I have corrected their formating meticulously on all there small assignments, in the hope that they would do it correctly for the large assignments –but this was to no avail.

When I read through their book reports and final essays I got Sparknotes referenced, I had only one page in a book sourced for the whole essay, I got work cited lists instead of bibliographies, and a whole bunch of other mistakes.

So after each assignment I would stand up in front of my tutorial and show where and how you footnote. I would ask them if they understood, and they would all shake their heads in agreement. STILL THERE WAS LITTLE IMPROVEMENT!

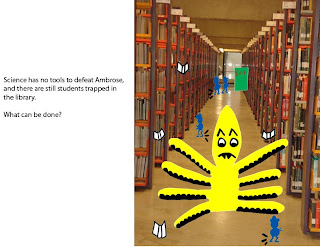
Though this picture book is designed for a younger audience, it’s really for all those TAs out there, smacking their head in frustration in their first year students' inability to follow a format. Sure, I know it can be hard if you are using a source that is unusual. But they all used internet or monographs, not some random artefact.

As the semester is almost over, I have a pending dread of marking their final exams.

Here is a link that will take you to the picture book I made. If this becomes supper popular on the web, I have a whole bunch of other villains for Ninja Historian to fight. He can become the Dora the Explorer of the history world.
https://docs.google.com/file/d/0B2TH6TCNbUaidnpOYU9RNnF3b3M/edit


Making it into Book Form:

My picture book is supposed to be a fun (and interactive way if used on an I-pad) of informing people about the need to footnote.


I really enjoyed using the pen tablet, it was supper fun! The most frustrating thing for me was the constant changing of document format, and fitting everything into the same size picture. The reason I found the need to change the format annoying was because the final image had to be a pdf. And since I always make typos it was very time consuming to go back once I thought I was done and reformat an image back to Photoshop, then add a new layer, then rewrite, then condense it back into one layer, then save as pdf, then recreate the large pdf again. And of course, once I think I am done again, I catch another error and have to do the process over again. Thus I think pdfs need to be editable, WORK ON THAT COMPUTER PEOPLE!


The process I took to make all the images and words the same size, so it looks like an open picture book:


1. Make a new document in Photoshop that is 8 × 11 inches.
2. Open a completed picture and flatten the layers, then change name of file.
3. Copy image, and paste onto new document. When I pasted the image it was like 200 times too large since I drew the pictures on a large document since it was easier to do with the pen tablet.
4. Then go to edit , then transform, then scale. Next click on the chain.
5. Next you begin to shrink the size of the image. You can’t just go straight to the roughly 20% size that fits half the page because the image disappears. You have to shrink about 20% at a time so that you can drag the image back into the center of the screen, so you can always find it.
6. Once the image is about half the page you move it to one side of the page.
7. Next you add a layer and click on the text icon.
8. Then you make a text box, and type in the words.
9. Then you flatten the layers, and save the image with a new name.
10. Once all your images are done you go into acrobat pro and create a multi-page file.

Picture and words now one image.

Wednesday 28 March 2012

Finito Pictures

So I have completed drawing and adding a background to the drawings. I really enjoyed the layer feature on Photoshop. Thanks to Sarah I was able to add my drawings and manipulate them on to the photos I took in Weldon.  

 What I did…

  1. I opened both my drawing and the photo in Photoshop.
  2. I used the “magic wand” tool, and then clicked on the empty space on the image that I drew.
  3. Next, I went to select, and clicked inverse.
  4. Then I copied my drawing and pasted it on the photo.
  5. Then I used the “rectangle” tool and made it trace over my drawing that I pasted in the photo. I needed to do this because the image was always too small when I pasted.
  6. Next, I did “command T” to “transform” the image in my rectangle. At this point I could enlarge and move my drawing all over the photo. Sometimes, depending on the image, once I was done transforming the whole drawing I would go back and rectangle off certain parts so that I could alter only a section of a drawing. This was very affective for creating distance in the image. I used it to create space between the Octopus and the Ninja.
  7. Once I was done transforming the image I clicked on the “checkmark”. Then I went to select and clicked on deselect.

 For some images I would add more to the drawing. To do this, I would drag the image onto my tablet. The really nice thing about the layers is that when you want to erase something you have drawn, it does not erase the background.
See how I moved the ninja in the photo with the picture background to create distance.

You click on the layer you want to work on.


For my next step I am going to make a PDF with two pages side-by-side like a picture book, which people will be able to flip through. I think that the picture book format will better suit how I originally outlined my story, when I pictured it like a silent film with text and picture.


Wednesday 21 March 2012

A few obstacles but back to progressing.

So I was originally planning on making my comic on Manga; however, it has decided not to open for me anymore. Now I am making my pictures on Photoshop which I am quite liking. Between the two programs I tried Adobe Illustrator but I found it VERY hard to draw with, it does not give the illustrator very much freedom with lines on the tablet.


After being frustrated with Illustrator because I had spent a few hours trying to draw a picture, but was not getting anywhere, I decided to switch to Photoshop. I was a tad panicked because I had never used it before, and my Professor was not on campus because it was a Thursday afternoon; so I could not bug him.  Probably the most important thing that I learned from this class is that you can google instructions and tutorials on line for pretty much everything. Thus, I decided to google how to use Photoshop and did a few tutorials.


Along with learning how to use new programs for this project I am also learning how to use a Mac. I am actually starting to like it; the only thing I tend to keep trying to do is Right click the mouse, which does not exist.


Another thing I keep doing because it’s hard to break natural reactions, is touching the button on the pen. The button is right where I naturally hold a pen, so I keep switching my grip without thinking. However, from this constant mistake, I learned that if you touch the pen button while having the tip to the screen a window pops up that allows you to manipulate the width of the pen line, which is very convenient.

 
To speed up the process of drawing, and to make things a tad more consistent from picture to picture,  I made an octopus outline that I saved, so I can use it for different screens.

Here are a few pictures that I drawn so far... However I have no clue how to combine the pictures with images on photoshop for the next phase.
The cover image


I drew the people in blue